To love at all is to be vulnerable. --C.S. Lewis
Tuesday, May 31, 2011
Monday, May 30, 2011
Friday, May 27, 2011
Wednesday, May 25, 2011
Monday, May 23, 2011
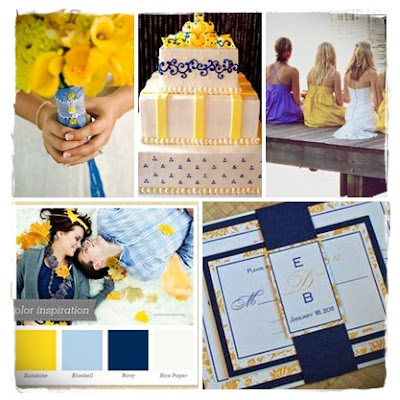
Summer of Color
With Summer just a month away why not make it a summer of color. Here is a little inspiration and keep a watch out for an up and coming wedding with Bright colors.
Thursday, May 19, 2011
Monday, May 16, 2011
Sunday, May 15, 2011
Saturday, May 14, 2011
An Inspiring Outdoor Wedding
In and around Southern Oregon you can always find lakes, mountains and beautiful places to get married in the outdoors. I came across this wedding the other day. I can see it at one of our local lakes, can you?
Friday, May 13, 2011
Wednesday, May 11, 2011
Tuesday, May 10, 2011
A Modern Vintage Photo Shoot
Thanks to Casey @ K-See images http://www.kseeimages.com/ we were able to pull off an amazing photo shoot and I am looking forward to the next one in the series.
My next project -The Brooch Bouquet
The Bridal Bouquets are spec ial and unique. Something that can be cherished and passed on for many generations. I think that these are a GREAT alternative to flower bouquets.Here are the directions in case you would like to try one yourself.
How to make a Brooch Bridal Bouquet:
50-85 brooches, large earrings or necklaces (I used 55 pieces. ½ were jewelry pieces from my grandmother and great-grandmother and the other ½ I purchased on clearance at Michael’s)
2 yards 5 inch wide Midori taffeta ribbon in gold
3 yards 3/8 inch wide Midori velvet ribbon in almond
3 yards of clear and gold seed beads strung on wire
Scissors
Wire cutters
Needle nose pliers
Hot glue gun with glue
22-gauge green florist wire
Light green corsage tape
Clear gem topped pins
2 stems of inexpensive artificial hydrangea-light green
Choosing your brooches:
You should consider a few things when choosing the jewelry pieces you are going to include into your brooch bouquet.
1. Colors- Choose at least three but not more than five color families and stick to them. I used shades of green, purple, turquoise and gold pieces with antique gold as my metal accent.
2. Finish- Choose one metal type. I prefer to use either all shades of gold metals or all shades of silver. I think it gives your finished brooch bouquet a more polished look.
3. Size- Pick jewelry pieces in a variety of sizes. It will give your bouquet depth and dimension.
4. Sentimentality- You may want to include a few pieces of jewelry that have special meaning to you. A brooch your grandma always wore, you and your fiancée’s initials or the earrings your mother wore on her wedding day would all be sweet additions.
5. Value- I would not use any jewelry pieces that are worth too much money. The bouquet will be tossed around and set down all day long. It would be terrible to loose a particularly valuable piece of jewelry.
6. Inspiration- If you have a brooch that you love use it to inspire to colors of the entire bouquet.
Step One: Wire and taping
Twirl the corsage tape down the wire pulling as you go. The tape sticks best when gently pulled and is overlapping itself. This will take some practice. Be patient and take your time
Step Two: Assemble the brooch bouquet
Hold the hydrangeas in your left hand. Insert your wired and taped jewelry pieces one at a time. The hydrangea acts as a spacer and it fills in any gaps between the jewelry pieces so you cannot see the wires. The hydrangea will be completely covered when you are done with your bouquet. Rotate the bouquet as you insert the brooches while maintaining a pleasing domed shape
Step 3: Seed bead loops
Make 3-inch loops out of wired seed beads.
Attach a long wire and tape the length. Make a total of four seed bead clusters.
Collar the bottom of the bouquet with the seed bead loops. Tape the wires in place down the handle of the bouquet.
Step Four: Ribbon collar and handle
Cut eight inches of the ribbon and set aside. Grasp the remaining ribbon in two fingers on the end at the edge. Hold the copper wire that runs the length of the ribbon and start pulling the wire, pleating the ribbon as you go. Continue until the entire ribbon is ruffled.
Grasp the wire you used to pleat the ribbon at both cut ends. Twist the wire together.
Run a bead of hot glue down the rough edges of both ends of the ribbon. Press the glued ends together to form a seam.
Wrap the stem of the bouquet with the eight inches of ribbon you placed to the side.
Place the bouquet handle through the ribbon collar. And glue in place.
Wrap the seam of where the bouquet collar meets the handle in velvet ribbon. Finish with a small bow and the gem headed pins.
The finished aisle worthy bouquet!
Design and How to found at fancypantsweddings.com
Subscribe to:
Comments (Atom)


